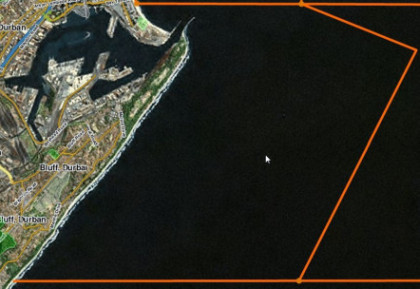
There does seem to be some standard ‘Coastal Layer’ that Waze applies. I browsed around using the app itself, and despite Durban having no coastline added, the Indian Ocean is surely indicated, but it’s not 100% accurate.
I’m not sure if the shoreline should be mapped as large water bodies.
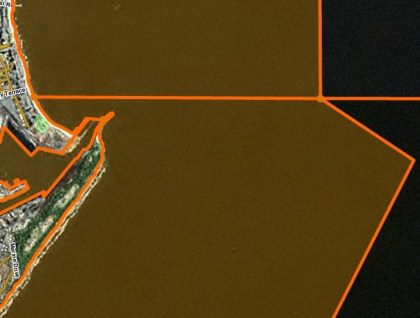
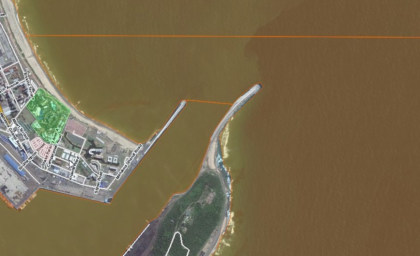
From what I’ve seen on the Livemap, it looks like parts of Durban, like the bay area around Ushaka Marine World, is all under water.
If anyone finds some underwater spots like these, it’s likely worth it to report it as per similar discussions in this thread Coastal Area Problem on Live Map.
I aquired some access there, and mapped some of the coastal areas as an example of what should work quite well for coastal Landmarks, if anyone is interested in such a project.
Looking at the Cape Town examples, all of the landmarks ‘overlap’ to ensure the area is covered.
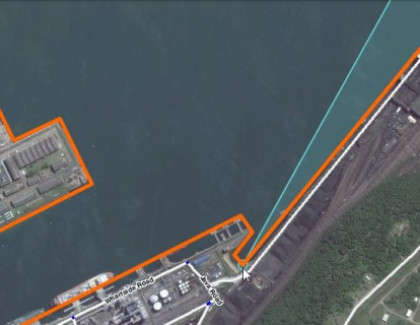
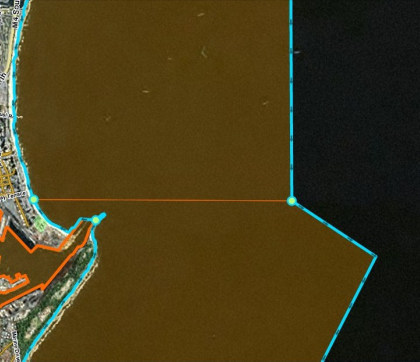
Using temporary laid down roads, you can use these as guidelines for a Coastal Landmark, or any Landmark for what it’s worth. When Landmarks are created near roads, they easily snap to roads, road junctions and geometry nodes on the road. Since they snap to the road centreline, creating adjacent Landmarks that snaps to a road in the middle, creates them exactly side by side. This way it would not show a gap between the Landmarks at any zoom level, even at maximum zoom (2m).
Completely surrounding your landmark with a road ‘template’ ensures that it would not inadvertently snap to other existing roads. It’s important that landmarks do not snap to regular navigable roads, as some Landmark types have abilities to suppress traffic report generation.
Roads are easy to lay at any zoom level, so it’s fairly quick to create large Landmark templates while changing zoom & laying the road. Start with a few ‘arms’ reaching that reaches the shoreline and extends a few Km into the ocean. It could either be 90 degrees to the shoreline, or straight east/west or north/south, depending on your preferences:
Once you have your template, create a landmark and start at one of the corners that will give a large fill indicator fairly quick when you added one or two nodes. Simply move the mouse pointer close to the road you are using as a guide, and you should find that the mouse pointer snaps and ‘sticks’ to the road’s geometry nodes nearby. Click to add a snapped geometry node, and continue until you completely filled in the landmark. Remember that you need to shift-click or double-click to complete it, so leave the last corner for that action :
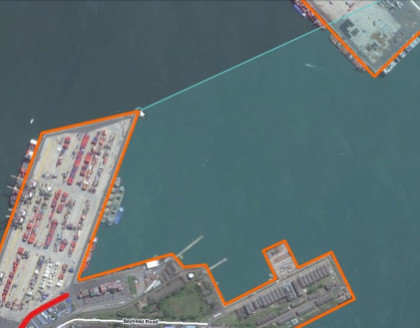
You can easily adjust your ‘template’ roads, and simply drag the Landmark nodes to snap into the new positions, after which they should still be side-by-side :
Al that remains is to delete the template roads and save, or if you prefer, save first and then delete the template roads. Either ctrl-click the roads to get them all, or use the ‘M’ key to toggle the multiple selection option. Delete if you are sure only the roads are selected, or else your Landmark might suddenly disappear when you save.
If the roads are saved first, they will appear as thin red lines, only selectable at 100m or higher zoom levels, unless you are using the Highlight Script. This may make it more tricky to delete them all afterwards :
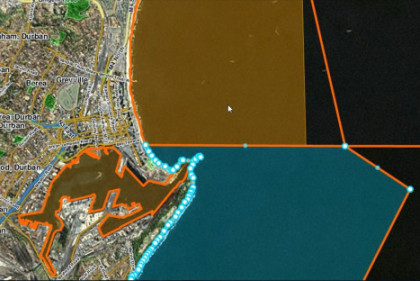
When you are done, the Landmarks are neatly laid out with all their edges aligned and your OCD side completely in check :
As mentioned, there are no gaps, even at the highest zoom, and all the edges line up correctly :
Remember that the new WME editor supports a City name for landmarks, that is initially defaulted to the closest city it’s in. It’s not currently saved after creation, so you need to explicitly add this afterwards if it should get a City name.
It’s important NOT to attribute City Names to coastal Landmarks, as this will likely extend the City limit ‘smudge’ to way out from where it should be.
Ensure you check the ‘No City’ box for these.
Anyone up for some shoreline mapping ?