You are not alone 
The community is here to help you and to answer as many questions as possible via:
- the Mauritius forum on Discuss (Mauritius forum), for questions, unlock requests and advice;
- the chat in WME, for a quick answer;
- Get Help Here, for questions about this Wazeopedia.
Roads / Segments
How do you create a segment?
Activating the tool
Two ways:
| How | to do it? |
|---|---|
| With the mouse Click the  at the top left of WME [1] |
and a blue circle appears at the pointer  |
| With the keyboard Press I |
The blue circle appears straight away, ready to create a road |

Drawing a segment
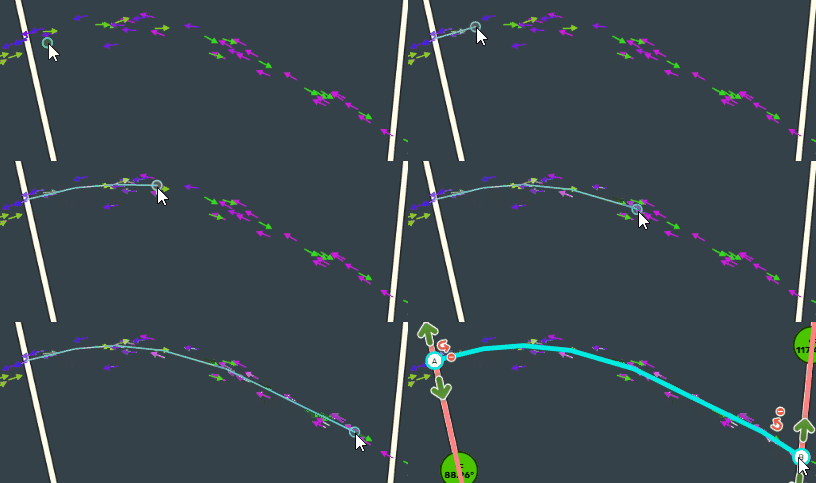
Switch on the GPS points layer, so that the road follows the Wazers’ tracks as closely as possible. If there are no GPS points yet for a new road, do your best with the satellite view.
| To create a segment, click as many times as needed to represent the bends. Once the segment is drawn, double-click to finish editing. |
 |
| If you have made too many vertices [2], you can delete some by hovering over them with the mouse pointer and then pressing the D key. | 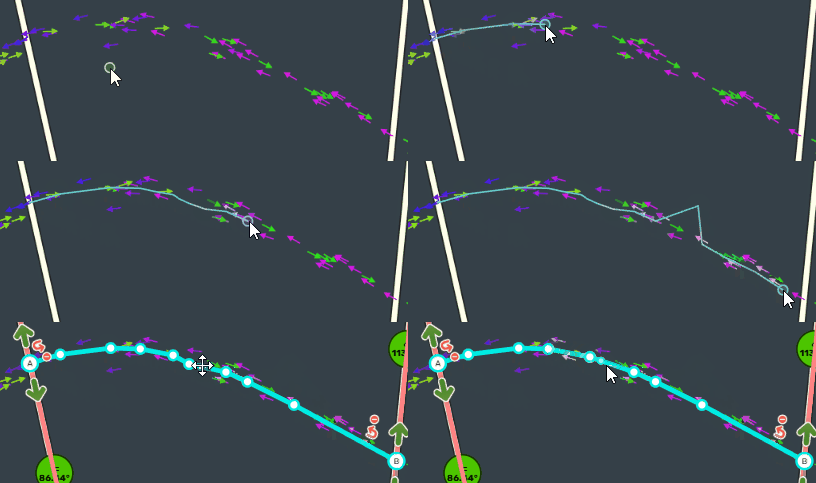 |
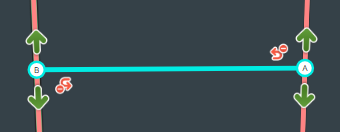
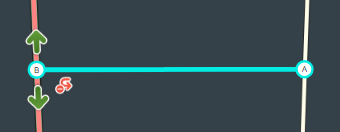
| Note that a node has been created at the intersection points and that green arrows appear. If this is not the case, your segment is not connected. This can happen if the segments are locked at a level higher than yours. |
|
Naming the segment
Find more information: Road naming
In Mauritius, the City field is the local authority (town or village) the road lies in, over its whole legal area; it is left empty on motorways (M roads) and ramps. The other naming rules (the name as written on the street sign, numbered roads) are on the page above.
| Info | Image |
|---|---|
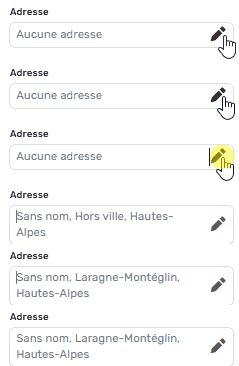
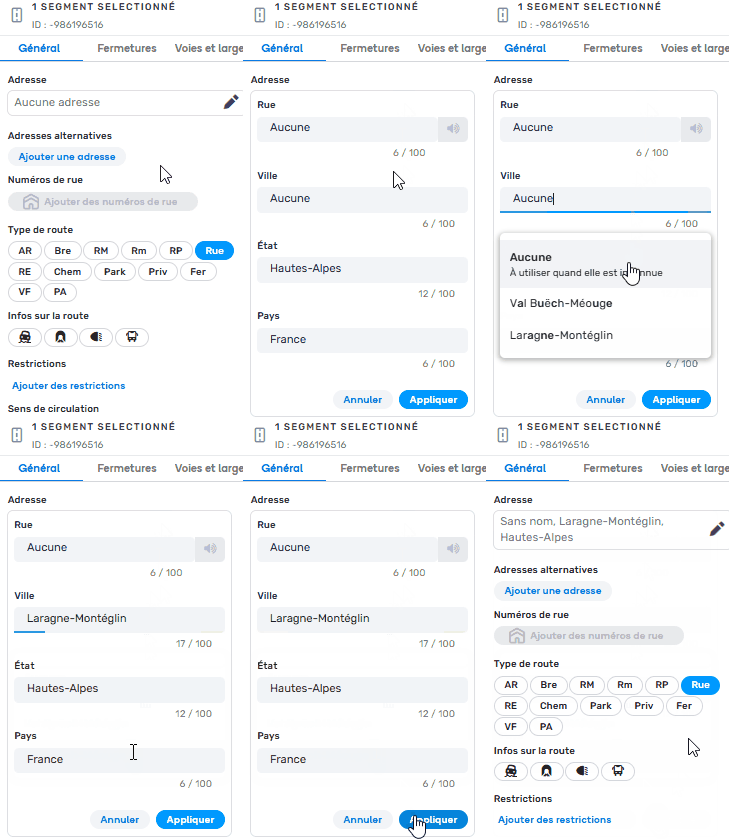
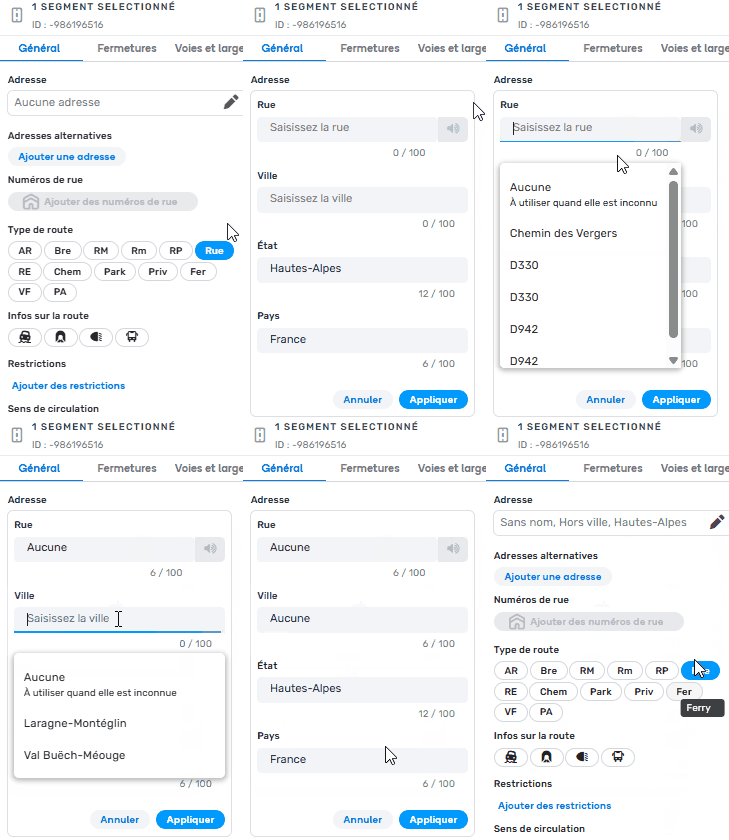
| Once the segment is created, you must fill in the city name and the street name, so that the segment is no longer highlighted in red. | |
Where there is no street name,
|
 |

 |
Segment properties
To read: Road classification
In Mauritius: M roads are Motorway, A roads Major Highway, B roads Minor Highway (with a few accepted exceptions). A road without a number is at most Primary Street, otherwise Street.
| Info | Image |
|---|---|
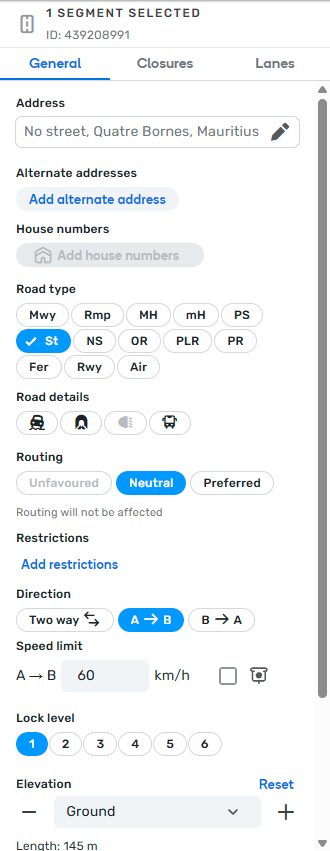
| Fill in these properties according to what you want to obtain: a two-way road, a one-way car park road, etc. The keyboard shortcut to change the direction of travel is the R key (after selecting the segment). Elevation is used when one road passes over another (bridge and tunnel). In that case, the upper road must be set to elevation 1. The lock protects a segment. Only editors of at least the level shown can edit this segment. N.B.:
|
Default interface Compact interface |

Checking the allowed turns
| Info | Image |
|---|---|
| You must check that the access into and out of this new road is correct. Remember to check all the segments connected to this new segment (here 4 to check + the new one). If the arrows are shown transparent, press the A key. If the arrows are not shown, press ⇧Shift+Z. If you are sure that all the turns are possible (green arrows everywhere), click the node and press the W key. Do not leave red arrows, except where turning is prohibited. There are 3 cases where the arrow must be red:
|
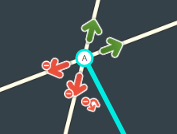
U-turns in Mauritius (decision of the Country Manager, UK model): U-turn arrows are not enabled, except in exceptional cases (narrow roads where a three-point turn is the only option). A red U-turn arrow is therefore the normal case. Reference: UK Quick Start and UK Junctions and Roundabouts.
How do you edit an existing segment?
Important!
Segments hold valuable information that cannot be seen, in particular the average speeds used to calculate travel times. They should therefore be recycled. Below you will find the right methods to reuse segments.
If the segment no longer exists: do not delete the segment straight away!
- Request a closure of the road.
- Set it to the Runway/Taxiway road type.
- Once the map update has taken effect (~48 h), delete the segment.
Redefining the geometry
Sometimes the geometry of a segment needs to be changed, for example if the GPS points no longer match the course of the segment.
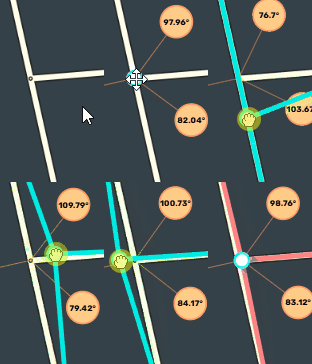
Moving a node
Select the node, hold down the mouse button and move the node.
Deleting vertices
You can delete vertices [2:1] by hovering over them with the mouse pointer and then pressing the D key.
Splitting a segment in two
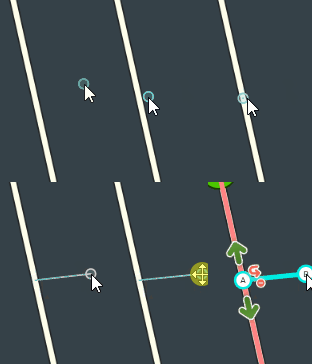
Create a segment at the place where you want the split, so that a new node is created, then delete that segment; if it is a new intersection, do not delete it.
Deleting an unnecessary node
When 2 segments have exactly the same properties (city name, street name, type, elevation, speed, etc.), they must be joined to form a single one. There are 2 ways to do this:
- Click the node to delete and press the Delete key on the keyboard.
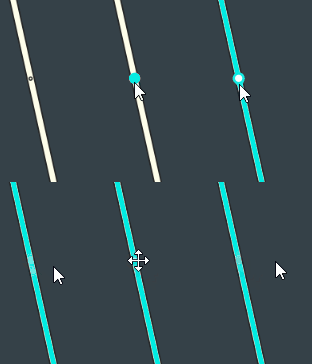
- Select the 2 segments. The bridge icon appears in the editor. Click it to join the segments. Then change the elevation to 0 (Ground) if needed.
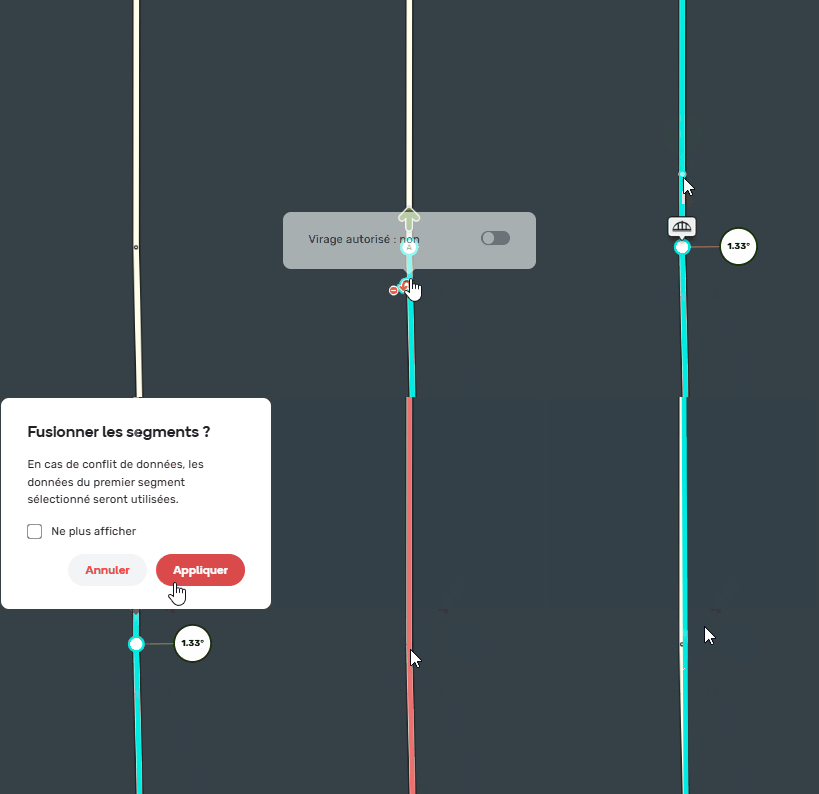
In both cases, you can also delete the vertex [2:2] with the D key if needed.
Template of topic 417120, post 1
Places / POIs
Creating a place
Drawing the place
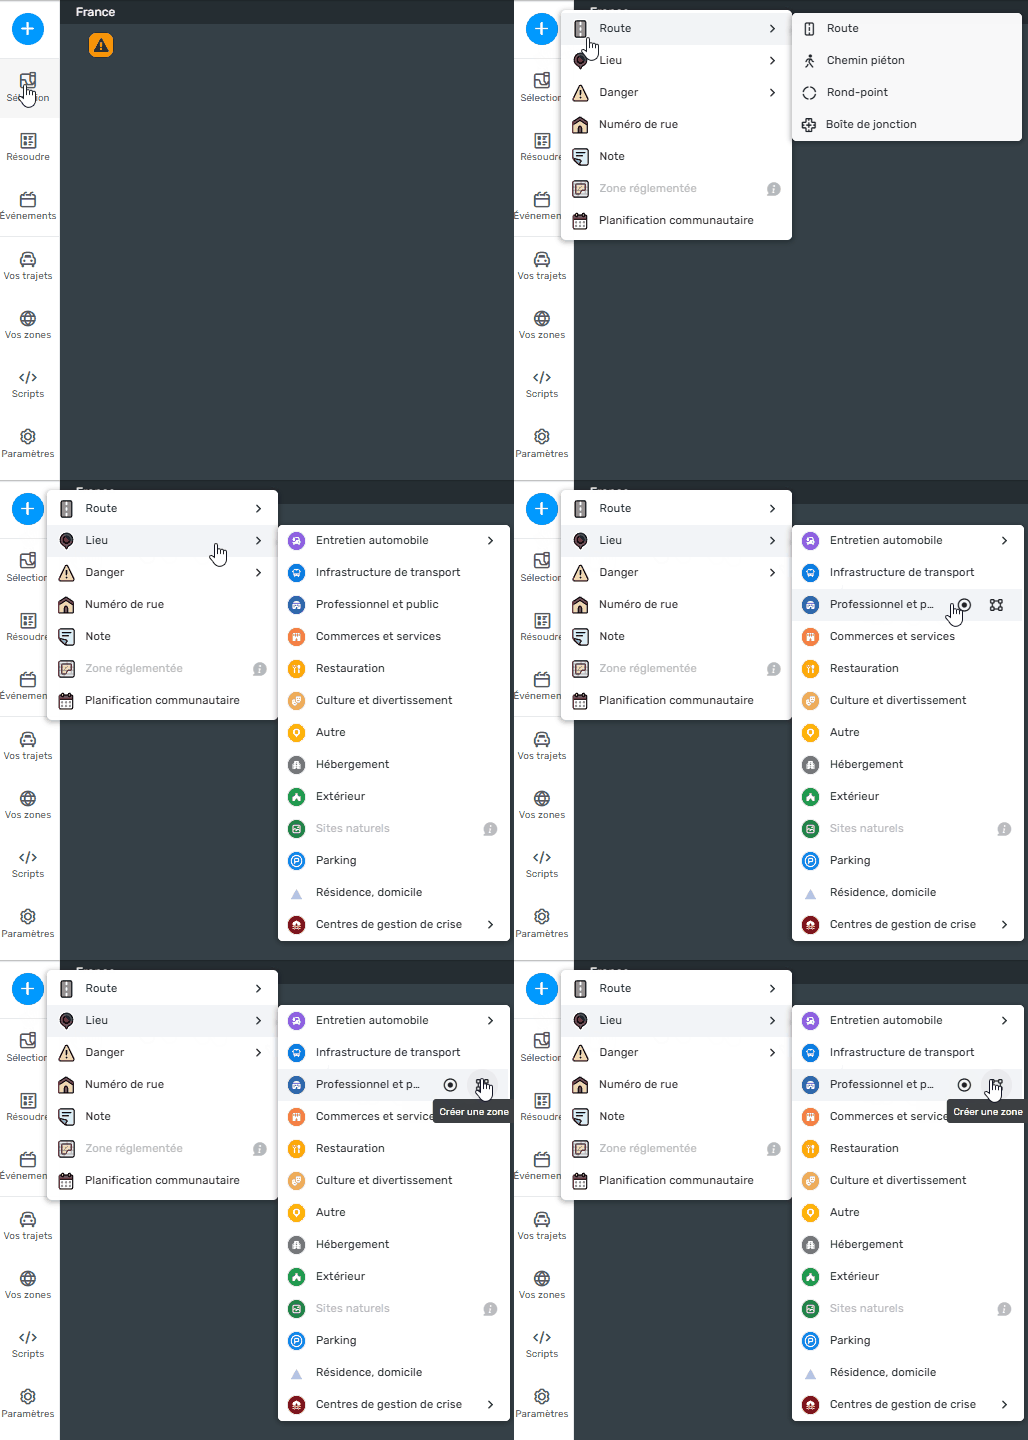
- At the top left of WME, click the ,
- Hover over Place,
- Hover over the category you want, if you choose the wrong category, you can always change it after creation,
- Click:
4.1 Point: if the area of the place is less than 500 m²
4.2 Area: if the area of the place is more than 500 m²
To draw the area, click as many times as needed to represent the surface you want. Once the area is drawn, double-click to finish.
To read: Places – General
Naming the place
Once the place is created, it must be named so that it can be found by the search engine of the app, the Live Map and WME.
The address of the place follows the same naming rules as a segment, so you must fill in the city name and the street name. Where there is none, tick “None”.
To read: Places – General
To read: Road naming
Positioning the entry point
The entry point is mandatory for Area places.
By default, the entry point of the place is the centre of the polygon for an Area Place, and the point itself for a Point Place.
In that case Waze will guide to the nearest segment. You should therefore move the entry point to the right place.
To read: Places – General
Editing a place
Places already on the map may be wrong or incomplete. Just select the place to edit and you will have exactly the same options as when creating a place. You can therefore:
- Fill in the missing information,
- Reposition the entry point,
- Redraw the geometry of the place,
- Change the category,
- Etc.
Special places
Some places have specific rules for how they are drawn and named, or specific attributes. You should therefore read the section about them.
These include:
- Natural features
- Car parks
- Gas stations
- Shopping centres and industrial / business parks
- Airports
- Bus, tram and metro stops
To read: Special places