Add Permanent Hazards in the WME
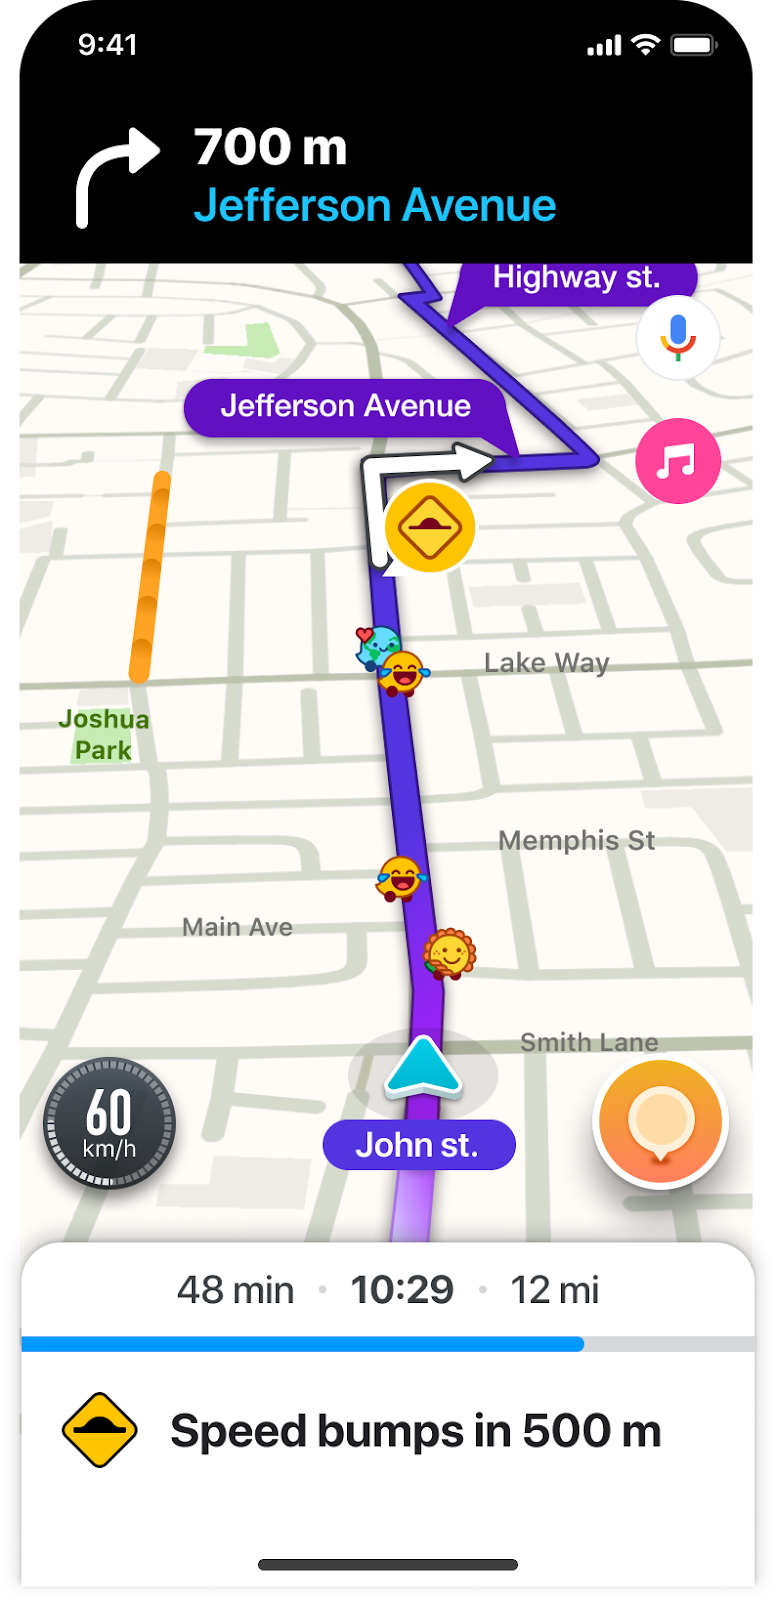
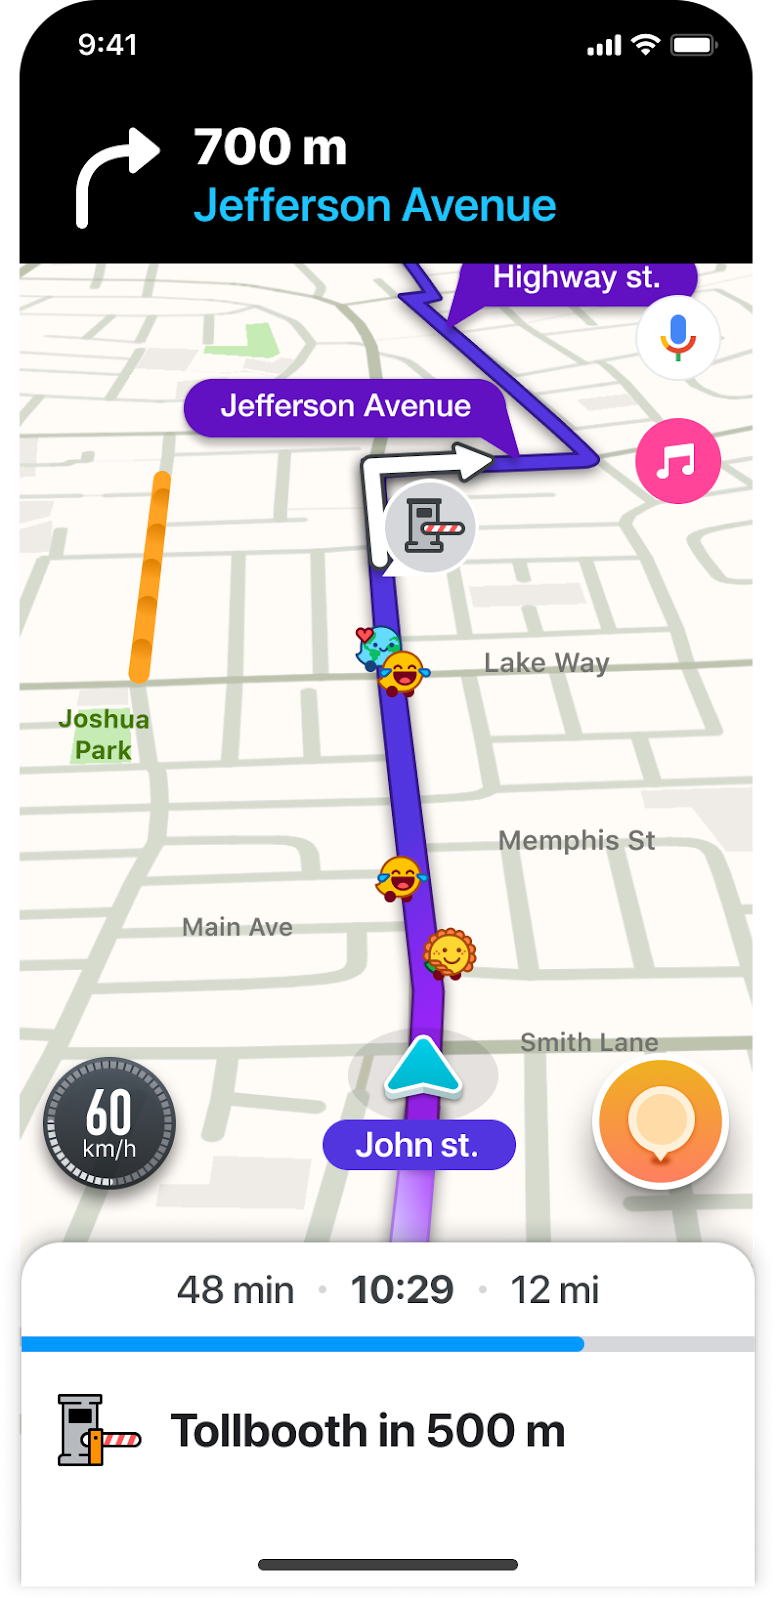
In Waze, Permanent Hazards (PHs) alert drivers about potential dangers due to difficult road conditions. When a driver approaches a PH within 500 meters, an alert is displayed to encourage them to slow down and drive more safely.
PHs are displayed as a “Bottom Alerter” with text-to-speech (TTS) and appear on the map as pins. To avoid overwhelming drivers with alerts, Waze employs a grouping and familiarity capping mechanism:
- Grouping: PHs of the same type that occur within 500 meters of each other are grouped together. Drivers receive a single alert indicating multiple occurrences of the same type ahead, along with a single pin on the map.
- Familiarity Capping: Drivers will receive the same alert a maximum of two times. After being displayed twice, the hazard will be temporarily hidden from the map for 21 days. After this period, the alert will be reset, and the driver will receive the alert twice again before it’s hidden for another 21 days.
In the Waze Map Editor (WME), editors can add PHs as points on segments for the following hazards:
Add a Camera hazard
Camera hazards alert drivers to various types of monitoring and enforcement devices on the road. When mapping in the WME, you can add individual camera pins to alert drivers, or define multiple camera types for a single camera pin. This allows one map object to represent several enforcement types at a single location.
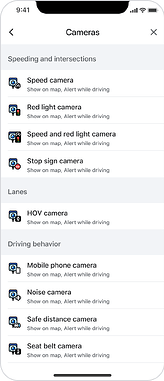
Each camera type has a dedicated alert, icon, and a dedicated setting in the app so that drivers can decide which alerts they would like to receive.
To add a Camera hazard:
- Log in to the Waze Map Editor
- Click
 , in the top-right of the map display
 - Turn on the Hazards layer
- Hover over
 , in the left sidebar. A popup menu will appear.
 - Hover over Hazards. A popup menu will appear.
- Hover over Cameras
- Select the relevant camera type. You can choose up to 5 types for this camera:
- Speed camera
- Red light camera
- Dummy camera
- Seat belt camera
- Mobile phone camera
- Stop sign camera
- Noise camera
- Safe distance camera
- Carpool lane camera
- Bus lane camera
- HOV lane camera
- If necessary, select the driving direction where the hazard should be applied
For two-way streets, the hazard is automatically applied to both directions.
- Click Save
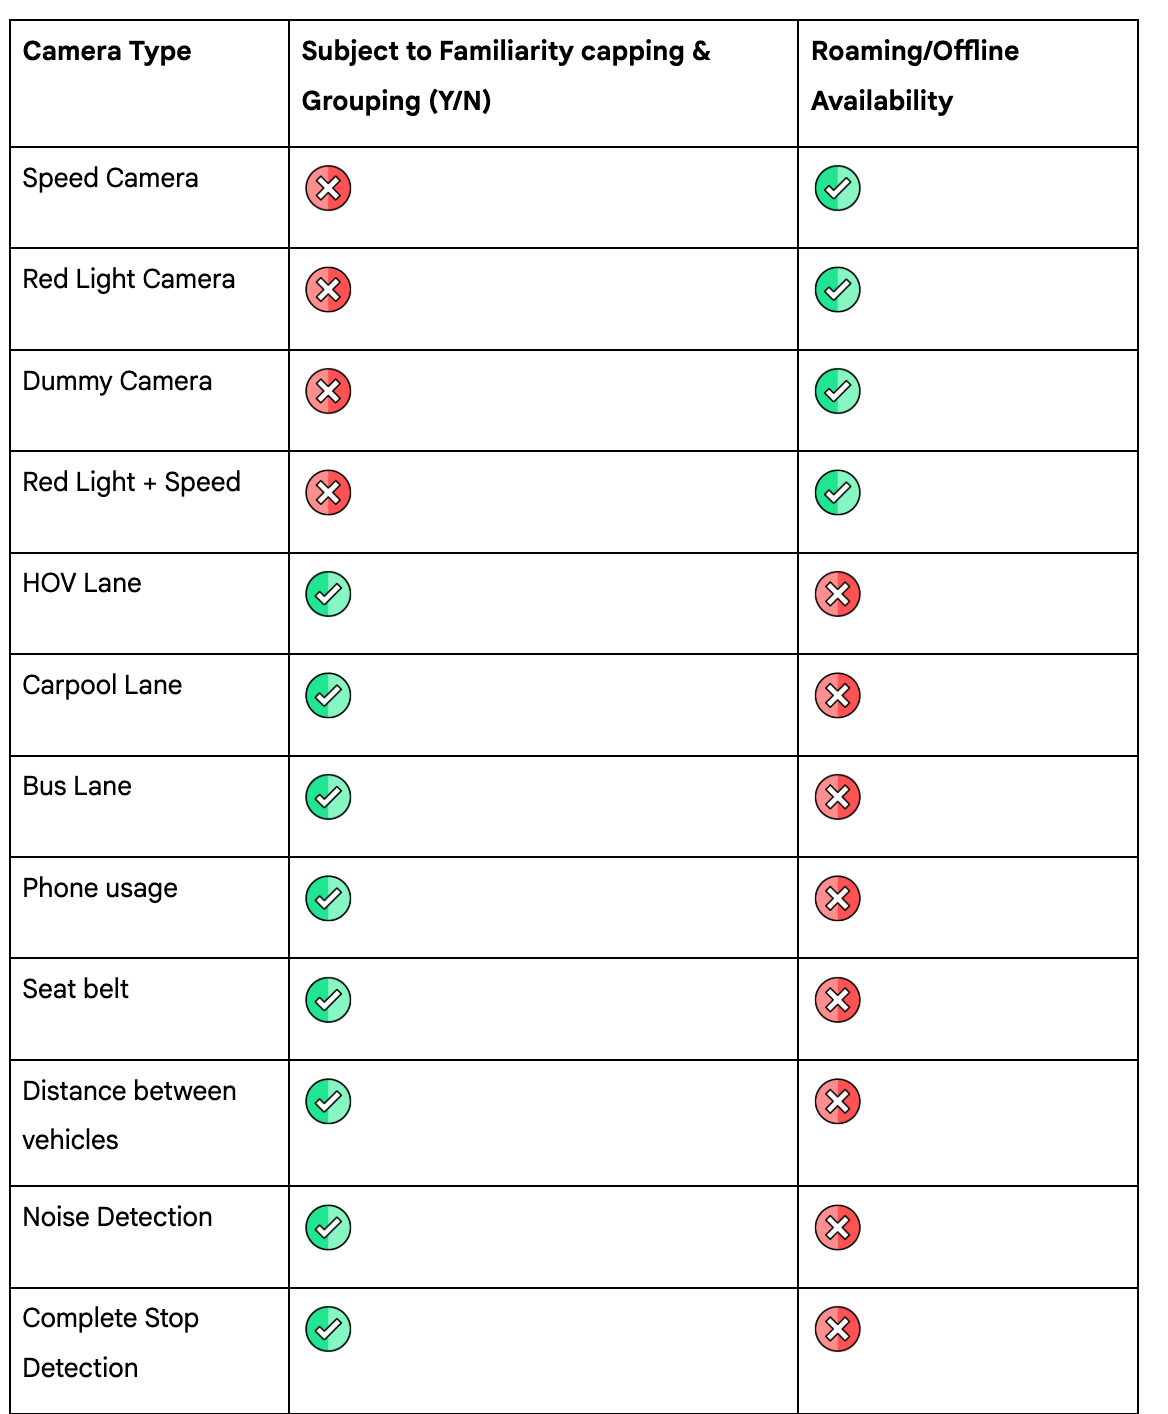
Specific Camera type behavior in the app
To avoid overwhelming drivers with alerts, Waze employs a grouping and familiarity capping mechanism for each Camera type:
Mapping guidelines for cameras
- Camera placement: Cameras should be mapped in their real-world location. If a camera is located between two segments, map it on the segment that it monitors. The alert to the driver is displayed before they reach the camera. Please note, cameras cannot be mapped directly on a node and like any other Permanent Hazard, they’re snapped to a segment.
- Direction: Cameras can be mapped as bi-directional, eliminating the need to map 2 separate cameras in opposite directions. This is open for community preference.
- Type: Always add all relevant types for a multi-type camera, even though the surfaced types are limited to one by hierarchy. Collecting this comprehensive information assists in future decision-making regarding which types to surface.
About multi-type cameras & hierarchy:
Waze supports multi-type cameras, allowing editors to define a single camera with more than one type. While editors can map all relevant types for a camera, users will generally only see one camera type in each alert, based on the following priority hierarchy (highest to lowest). However, if a multi-type camera includes both “Red light” and “Speed” camera types, the alert will mention both.
For example, if a multi-type camera identifies speeding and phone usage, only a Speed camera alert will appear, as the Speed Camera hazard is a higher priority.
Camera availability is determined by the map editor community in your country. View the list of all camera types available for your region here.
Add a Sharp curve hazard
- Log in to the Waze Map Editor
- Click , in the top-right of the map display
- Turn on the Hazards layer
- Hover over , in the left sidebar. A popup menu will appear.
- Hover over Hazards. A popup menu will appear.
- Select Sharp curve
- Select the relevant road segment
- If necessary, select the driving direction where the hazard should be applied
For two-way streets, the hazard is automatically applied to both directions.
- Click Save
Add a Railroad crossing hazard
- Log in to the Waze Map Editor
- Click , in the top-right of the map display
- Turn on the Hazards layer
- Hover over , in the left sidebar. A popup menu will appear.
- Hover over Hazards. A popup menu will appear.
- Select Railroad crossing
- Select the relevant road segment
- If necessary, select the driving direction where the hazard should be applied
For two-way streets, the hazard is automatically applied to both directions.
- Click Save
Add a School zone hazard
Learn more about School zone hazards and how to add them.
Add a Complex intersection hazard
Add a “Complex intersection” hazard under the following circumstances:
- Multiple roads meet at a single point: If more than 2 roads converge at an intersection, creating a complex layout
- Unusual traffic flows: If traffic patterns deviate from standard merging or yielding rules, such as vehicles entering or exiting the intersection from unexpected areas
- Insufficient lane guidance: If you believe that drivers would benefit from an additional warning about the intersection, even if lane markings and signs are present
- Log in to the Waze Map Editor
- Click , in the top-right of the map display
- Turn on the Hazards layer
- Hover over , in the left sidebar. A popup menu will appear.
- Hover over Hazards. A popup menu will appear.
- Select the relevant road segment
- If necessary, select the driving direction where the hazard should be applied
For two-way streets, the hazard is automatically applied to both directions.
- Click Save
Add a Multiple lanes merging hazard
Add a “Multiple lanes merging” hazard if more than 2 lanes merge into one, including if the merge starts outside of the current map segment.
- Log in to the Waze Map Editor
- Click , in the top-right of the map display
- Turn on the Hazards layer
- Hover over , in the left sidebar. A popup menu will appear.
- Hover over Hazards. A popup menu will appear.
- Select the relevant road segment
- If necessary, select the driving direction where the hazard should be applied
For two-way streets, the hazard is automatically applied to both directions.
- Click Save
Add a Speed bump hazard
- Log in to the Waze Map Editor
- Click , in the top-right of the map display
- Turn on the Hazards layer
- Hover over , in the left sidebar. A popup menu will appear.
- Hover over Hazards. A popup menu will appear.
- Select the relevant road segment
- If necessary, select the driving direction where the hazard should be applied
For two-way streets, the hazard is automatically applied to both directions.
- If necessary, turn on “Big or destructive speed bump?” option
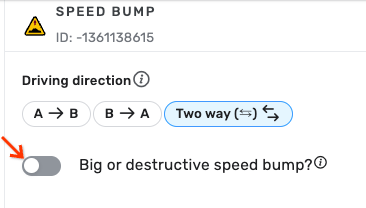
Turn on “Big or destructive speed bump?” only for speed bumps that pose a real danger and require a speed reduction to prevent car damage.
Note:
-
The “Big or destructive speed bump?” option is currently only available in the following countries:
- Belarus
- Belize
- Bolivia
- Brazil
- Chile
- Colombia
- Cuba
- Dominican Republic
- Ecuador
- El Salvador
- Guatemala
- Haiti
- Honduras
- Hungary
- India
- Iraq
- Israel
- Italy
- Jamaica
- Kenya
- Latvia
- Mexico
- Nicaragua
- Panama
- Paraguay
- Peru
- Qatar
- Russia
- Serbia
- Trinidad & Tobago
- Ukraine
- Uruguay
- Venezuela
-
If you’d like to add this option to your country, ask your community coordinator to request it here. A Waze Community Manager will review the request.
-
In some countries, by default, all speed bump hazards will have “Big or destructive speed bump?” turned on
- Click Save
Add a Toll booth hazard
- Log in to the Waze Map Editor
- Click , in the top-right of the map display
- Turn on the Hazards layer
- Hover over , in the left sidebar. A popup menu will appear.
- Hover over Hazards. A popup menu will appear.
- Select the relevant road segment
- If necessary, select the driving direction where the hazard should be applied
For two-way streets, the hazard is automatically applied to both directions.
- Click Save
Got questions?
Do PHs have lock levels?
Yes. By default, PHs are locked to L4 or higher. However, this can be changed, as each country has a configurable minimum lock level for editing PHs.
Can I request to change the minimum lock level required to edit PHs in my country?
Yes. Ask your coordinators to complete the form that has been shared in the Coordinators Forum.
What happens if a PH is added to a segment with a lower lock level than the country’s minimum lock level?
The PH will inherit the lock level of the segment.
For example:
- If the segment is locked to L1 and a PH is added, and the country’s lock level is L4, the lock level for the PH will be L4
- If the segment is locked at L5 and a PH is added and the country’s lock level is L4, the lock level for the PH will be L5
Can a low-level editor delete a PH?
No, a low-level editor cannot directly delete a PH. However, if the editor deletes the segment containing the PH, the PH will also be deleted.
What happens if I change the lock level of a segment with a PH?
This means the lock level for the PH on that given segment will be changed as well.
What happens if I delete a PH on a segment?
The segment will remain unchanged. You are just removing the hazard.
Does a PH’s directionality change when moved between segments or when the segment’s direction is altered?
Yes, a PH’s directionality can change when moved between segments or when the direction of the segment it’s on is altered. The initial directionality of a PH is determined by the segment it’s placed on.
For example:
- If you move a PH from one-way segment to two-way, both directions will be enabled
- If you move a PH from two-way segment to a one-way, only the one direction will be enabled
- If you change a two-way segment’s direction, the PH’s directionality will also change
How are PHs affected when segments are split or merged?
When a segment is split, each new segment inherits the initial PHs.
For example:
We have a 1000-meter segment with three PHs at separate intervals:
- Segment C = 1000 m
- PH X @ 100m
- PH Y @ 400m
- PH Z @ 800m
If the segment is split into two 500-meter segments, each new segment will inherit the PHs that were originally within its respective 500-meter portion:
- Segment A = 500m long
- PH X @100m
- PH Y @400m
- Segment B = 500m long
- PH Z @300m
When segments are merged, the PHs from the original segments are combined into a single list for the new, merged segment.
For example:
We have two segments to merge. Each 500 meters long with their respective PHs:
- Segment A = 500m long
- PH X @100m
- PH Y @400m
- Segment B = 500m long
- PH Z @300m
Once merged, the new segment will inherit the PHs that were originally within each of its respective 500-meter portion:
- Segment C = 1000 m
- PH X @ 100m
- PH Y @ 400m
- PH Z @ 800m
Can we add PHs from the app?
Not at the moment. We’ve spoken about this internally and understand it can be valuable since some hazards are hard to locate using satellite imagery, but it is not in the roadmap for now.
Will PHs appear in the app in real time, once they are added to WME?
No, they require a tile build update like other map entities.
When is Phase 2 planned for?
Phase 2 (scheduler + hazards on polygons) is in design phases. Likely 2024, but we don’t have a timeline yet.